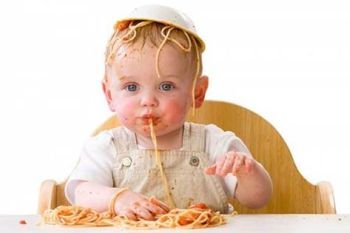
Funny baby eating spaghetti!!!
Feeding Baby: 8 Eating Milestones
12-18 months
Independent eating
Finger foods aren’t just snacks or incidental additions to your toddler’s diet. You can supplement even the fussiest toddler’s menu with appealing goodies that will both add nutritional value and encourage her to learn the skills of independent eating.
How can I encourage my child to eat foods with different consistencies?
Some little ones find the transition from purées to lumps, and then to mashed, chopped, and cut food more difficult than others, and may be reluctant to eat meals that require chewing. In some cases, it comes down to laziness, or it may be that weaning took place a little later than usual. It is important that you continue to introduce foods with different textures. One of the best ways to do this is to offer what is effectively a balanced selection of finger foods at every meal, so everything he eats must be chewed, with no purées at all. For example, offer peas, sweet potato cubes, strips of chicken, and chunks of steamed new potatoes, or rice with fish balls and steamed broccoli. Many children seem to find it easier to move straight on to this “real food,” rather than progressing through different textures.
How small should I mash or chop foods for my toddler?
Once your toddler has some teeth, she can manage most soft foods that have been diced, grated, or mashed. In fact even without teeth it is surprising what a set of gums can munch their way through. Certainly by 12 to 18 months, your toddler should be able to enjoy a variety of different finger foods, which can be incorporated into his regular meals. As long as the food isn’t too tough, which may be beyond the capabilities of little teeth and gums, small pieces of most foods can be managed easily. If your child gags or has trouble managing diced foods, try making the pieces a little smaller until he’s more adept at chewing. I often find it useful to whiz tougher cuts of meat in a grinder for a few seconds, to smooth out some of the lumps and bumps, and make them a little softer for little ones. Use your ”ground” meats as a base for any meat dish, including pasta sauces, casseroles, or dishes such as Chicken meatballs and Funny-face hamburgers. You can also try increasing the chunks in the foods that he already loves and is most familiar with, where they will not be so readily noticed or identified!
My toddler still refuses to eat anything with lumps-what can I do?
Some babies and toddlers, particularly those who have been weaned onto jarred baby foods, tend to like things smooth! They can often develop the most amazing ability to filter out every single lump and spit them out. Some little ones simply gag because it’s taken them a little longer to develop the knack of chewing things well enough to make them easily swallowed. You should visit your doctor, however, if your toddler regularly gags or refuses lumps, as there may be a physical cause at the root. There are a few ways you can help your child to accept lumpy food. First of all, don’t force it. If your toddler senses that you are angry or anxious, he’ll begin to find the whole experience of eating traumatic, and may literally gag or choke on even the tiniest lumps because he feels under pressure.
Slowly increase the lumpiness of his food, and allow him to play messily with it. Babies and toddlers tend to prefer overall lumpiness to something smooth with the occasional lump, so pasta stirred into a favorite purée is a good way to introduce more texture.
Also offer finger foods alongside his meals. Start with soft foods, such as steamed carrots and broccoli or avocado, and move on to slightly harder foods, such as toast fingers and well-cooked pasta shapes, before he’s comfortable with chewing, when you can introduce cubes of soft cheese, dried apricots, and chunks of meat, for example.
Once your toddler starts to experiment a little and becomes more comfortable with lumps, it’s a good idea to encourage him to stir “lumpy” ingredients into his foods, such as raisins into cereal, or to dip finger foods into purées. Over time, all will be well.
What are the best finger foods for this age group?
A Incorporating as many different food groups as you can will make a big difference to the number of nutrients your toddler gets. Raw vegetables, such as carrot sticks, cucumber, or strips of red pepper, are often more popular than cooked. Try some more unusual vegetables, too. Crunchy sugar snap peas are delicious-serve them with hummus. Berries, grapes, mango, apple, and banana are all healthy snacks. You can also make fresh fruit popsicles by blending fruits together with fruit juice or yogurt and freezing in mini-popsicle molds-chewing on something cold will also help relieve your toddler’s sore gums. For wholesome carbohydrates, choose breadsticks, whole wheat toast fingers, finger sandwiches, flapjacks, rice cakes, healthy breakfast cereals, and well-cooked pasta. As long as there is no risk of choking, anything goes!
- Finger food dips
Make a dip for dipping vegetable batons by blending together 41⁄2oz (125g) cottage cheese, 2 tbsp mayonnaise, a heaping tablespoon ketchup, and a squeeze of lemon juice. For a more fruity dip, blend together a little cottage cheese with some sugar, a few drops of vanilla, and some apricot purée.
Rainbow pasta
Preparation Time: 10 Minutes
Cooking Time: 15 Minutes
Makes: 2 Child Portions
When learning to feed themselves, toddlers can get frustrated with a spoon and fork and prefer to use their fingers, so pasta dishes that are not too “slippery” are ideal. This one includes a delicious and colorful range of vegetables-you can both have lots of fun identifying the colors as your toddler eats.
1⁄2 heaping cup pasta shapes
½ carrot, peeled and cut into matchsticks
2 broccoli florets cut in small pieces
2 tsp olive oil
½ yellow summer squash, halved lengthwise and sliced
¼ small, red bell pepper, seeds removed and cut into matchsticks
3 tbsp crème fraîche
1⁄2 cup shredded Cheddar cheese (medium or mild, according to preference)
2 tbsp grated Parmesan cheese
1. Cook the pasta in boiling water according to package directions, adding the carrot and broccoli for the last 3 minutes of the cooking time.
2. Meanwhile, heat the oil in a large frying pan or wok and stir-fry the squash and red pepper until softened and lightly golden, 3-4 minutes.
3. Drain the pasta, carrots, and broccoli and add to the frying pan. Add the crème fraîche and cheeses. Toss everything together over low heat for about 1 minute to heat the crème fraîche and just melt the cheeses. Serve warm. (This dish is not suitable for reheating.)


